How to build a telegram-controlled sous vide using CraftBeerPiOS October 1, 2018
Posted by GuySoft in Electronics, open source, python.Tags: cooking, food, open source, raspberrypi, telegram
trackback

Sous vide pot with temperature sensor
Hey all,
So I’ve been cooking sous vide a few months now, with a sous vide I built myself. Its connected to a RaspberryPi and can be controlled via the web or telegram.
No soldering required!
Flash a ready made image to the Pi!
Bill of materials
- Slow cooker (crockpot) with a ‘high’ option. You can get them second hand, they are pretty cheap. Make sure it has no digital control.
- Raspberry Pi, even version 1 should work – also an SD card and power supply for the Pi.
- Pi Plate prototype board. Make sure you get one that matches your Raspberry Pi footprint if you are re-using an old Pi.
- Solid state relay that can handle mains
- Power cables
- Data cable to connect the relay to the Pi
- Power socket and power connector for your country – get locally so it fits your country standard.
- Water resistant temperature sensor DS1820 x2 – Get a spare one so you can measure the temperature difference and make sure your sous vide is uniformly heated.
- Important – 3D printed enclosure for raspberrypi (Raspberry Pi 1) and enclosure for the relay – you are mixing water and electricity in a kitchen, don’t be an idiot.
Assembly
- Build the following construction from the relay. You need phase to go via the relay, and in to the sous vide. Please look at this chart to understand what cable is equivalent in your country.
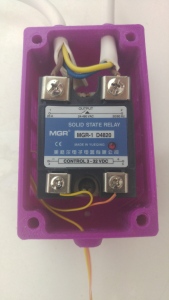
Relay assembly – brown writes is phase
- Close up the relay in its box, and attach the power plugs
Relay in its case and power sockets in place, transparent sticky tape protects case
- Wire the temperature sensor DS1820 to GPIO pin 4 (you can use one on the screw terminal and another on the jumper slot, the second one is only to make sure you have a working sous vide.
- Connect SSR – terminal to ground, and + terminal to GPIO 17 (you can pick other GPIOs if you want).

Raspberypi wiring . Two temp sensors on GPIO 4, one Solid state relay (SSR) on GPIO 17
- plug the relay in the your power supply and plug your slow cocker to it. DANGER: Make sure your connections are right with a multimeter before. If you are unsure don’t do this. Mains power can kill!
- That’s it!


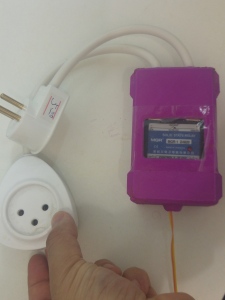
Rasepberrypi and relay in cases
Sous vide pot with temperature sensor
Software
I have built a distro called CraftBeerPiOS based on CraftBeerPi 2.2. Why 2.2 and not 3? Because there is an issue with the license. I would have picked something else, but Manuel the developer clearly writes in the README that CraftBeerPi is open source. Its dodge I know, I would welcome someone rewriting something like this. I would help build a distribution.
Why telegram? (which is optional)
I found that telegram was much faster and handy while I am in the kitchen, or if I want to turn the sous vide on before I come home. So I warmly recommend it over CraftBeerPi’s interface. I will mark all its step as optimal in case you don’t want it.
Anyway,
- All you got to do is just flash the img to the Pi. Which can be downloaded here. It has both CraftBeerPi and a telegram bot pre-install. The bot is written by me and is open source.
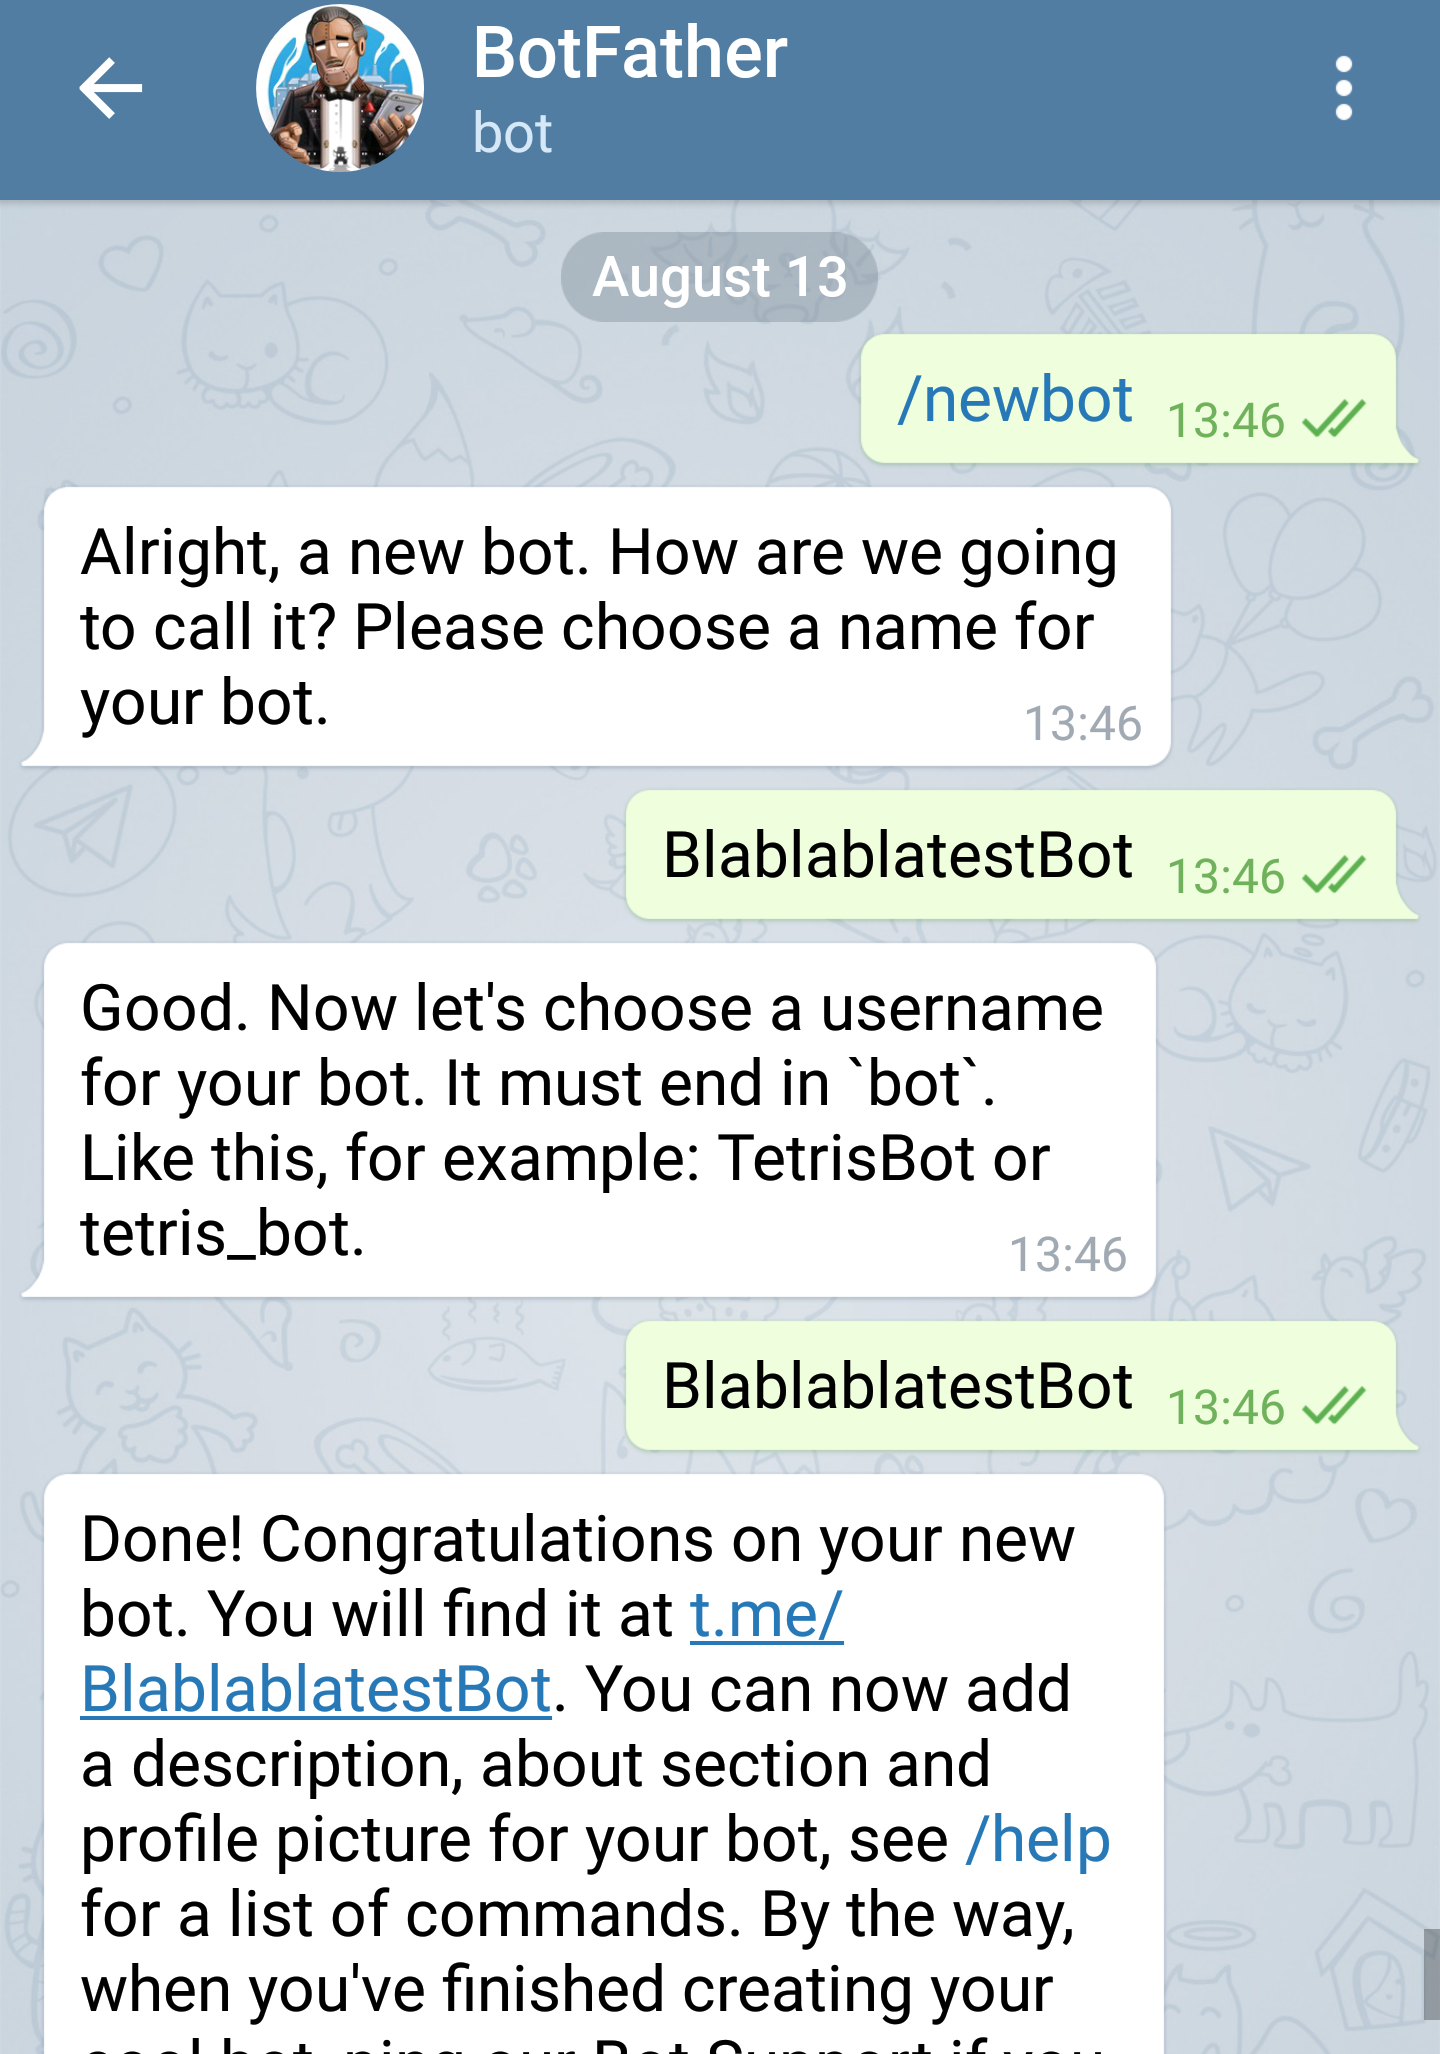
- [optional telegram] Create a telegram bot using the botfather here is an explanation how to do this. Its really easy – basically you text a bot the command /newbot, you are asked a few questions and get an API token, you place this token in the file /boot/config.ini where its asked for.
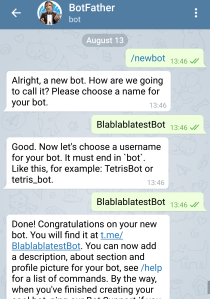
Setting a new bot
- Open the sdcard /boot partition, you can do this on windows. And edit the file /boot/craftbeerpios-wpa-supplicant.txt

Set wifi setting you need to change
- [optional telegram] Add your telegram token

config.ini, Telegram token goes here
- Pop the SD card in the Pi and boot it
- You might want to attach a screen on first boot and make sure everything went well. If it did, you should have on your network a service on http://craftbeerpi.local:5000 .If you can’t find the hostname try the Raspberrypi’s IP address. Depending on your network router it might not work.
- Follow on that link the wizard to set up your temperature, relay, and kettle.

CraftBeerPi all set up with a thermometer and relay

Hardware setting in craftbeerpi
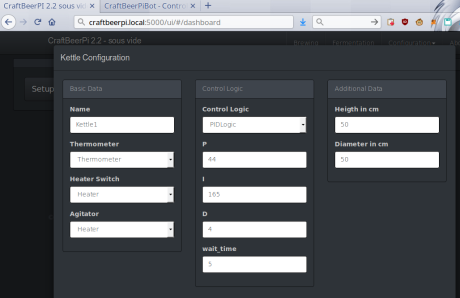
How the kettle configuration looks
- [optional telegram] Text your new telegram bot the command /start this should make your telegram user appear in the telegram control panel located at http://craftbeerpi.local:5001.
- Login default user is admin, password 1234
- [optional telegram] Set yourself as an admin, otherwise you can’t control your sous vide. This is for security reasons.
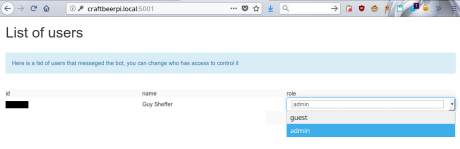
CraftbeerPiBot access control
- [optional telegram] Send /help to the bot to see the available commands. You can set the sous vide temperature, turn it on and off.
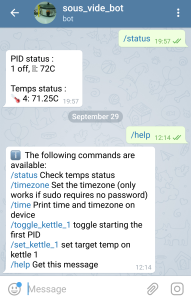
Sous vide bot list of commands


Thats it, enjoy! Share recipes!

Sous vide pork belly cooked in maple and liquid smoke and rosemary for 18 hours at 72C

what would you do if a fire starts (god forbid) and you far
Even if the relay burns out, the electric cooker has all the safety mechanisms it comes with. Its designed to be left alone. Same goes for the SSR, its the same hardware your fridge uses, you leave that on when you are far away.
I used this to do the job. Much easier
https://www.ebay.com/itm/MH1210B-220V-LCD-Digital-Temp-Controller-Thermocouple-with-Alarming-Sound-R2J2/312218247268?_trkparms=aid%3D111001%26algo%3DREC.SEED%26ao%3D1%26asc%3D20160727114228%26meid%3D5c64af79cb8c4a6587c2c629fb3c9970%26pid%3D100290%26rk%3D1%26rkt%3D1%26sd%3D312218247268%26itm%3D312218247268&_trksid=p2060778.c100290.m3507
that’s also pretty neat, although no wifi it has low price tag. Do you have photos of the mains connection? Or photos on general?